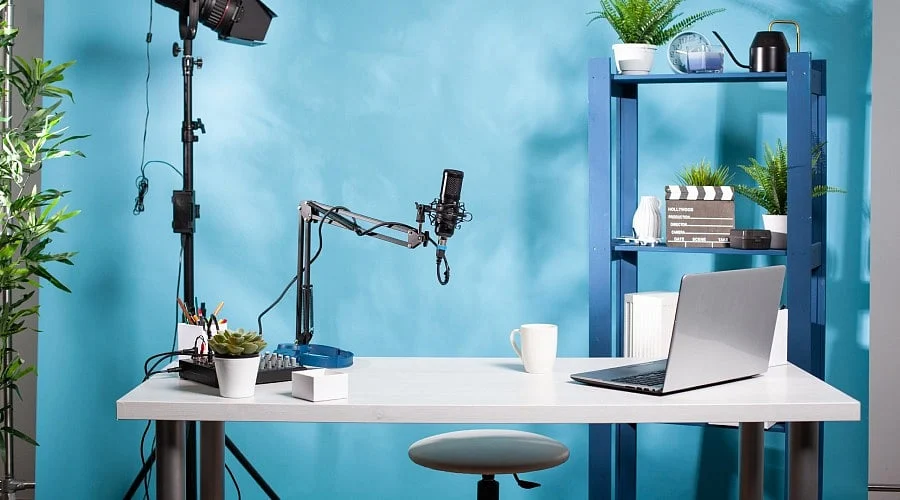
Key Takeaways –
-
Opt for a dynamic microphone: This style helps minimize unwanted room reflections and performs reliably in standard home recording environments.
-
Focus on essential add-ons: A boom arm, pop filter, shock mount, and closed-back headphones address frequent recording challenges.
-
Address the room first: Soft furnishings and a quiet environment often yield better results than investing in high-end hardware.
While an engaging topic and skilled host are vital, poor audio quality can quickly ruin a podcast episode. Background hum, echo, desk vibrations, and sharp breaths typically create more difficulties than simply lacking a high-end microphone. Fortunately, a straightforward configuration can resolve many of these issues without requiring a professional studio setup.
The ideal introductory rig prioritizes sound clarity over unnecessary hardware. A dynamic microphone, closed-back headphones, a sturdy boom arm, and a pop filter fulfill the core requirements. Enhancing the quietness of the room provides another significant boost. Furthermore, this strategy allows for simple future upgrades without demanding a heavy initial investment.
Start with the Right Microphone
For most home-based podcasts, a dynamic microphone is the most practical choice. These mics capture significantly less ambient room sound compared to sensitive condenser alternatives—a crucial advantage in bedrooms, home offices, and other untreated spaces.
The Samson Q2U serves as an accessible entry point by supporting both Universal Serial Bus (USB) and XLR connectivity. USB enables direct computer plug-and-play, whereas XLR offers an upgrade path to an external audio interface later on.
Similarly, the RØDE PodMic USB features USB-C, XLR, and built-in headphone monitoring. If you need to contend with heavy background noise, the more expensive Shure MV7+ is worth considering. Professional-grade options like the Shure SM7B and SM7dB exist, but beginners rarely require that level of equipment.
Microphone placement also drastically impacts vocal fidelity. Maintaining a distance of roughly 6 to 12 inches is generally ideal, and angling the mic slightly off-axis prevents harsh plosive bursts from striking the capsule directly.
Also Read – Best Microphones for Podcasts & Streaming
Add Accessories that Solve Real Audio Problems
A boom arm belongs near the top of any shopping list. It maintains a consistent mic height and distance, cuts down on desk-borne vibrations, and frees up physical workspace for keyboards or notes. Though basic models cost far less than a new microphone, their day-to-day impact is substantial.
A pop filter or foam windscreen is another affordable upgrade. Hard “P” and “B” consonants expel rapid air blasts toward the microphone, but a filter diffuses this air before it hits the capsule, ultimately saving editing time.
Shock mounts provide an extra layer of defense. Accidental bumps, hand gestures, and desk taps easily travel through rigid stands into the microphone body. A shock mount isolates the mic from these mechanical vibrations, making it particularly useful for creators who record at a desk or gesture frequently.
Investing in closed-back headphones is also crucial. They expose distortion, hums, mouth clicks, and other audio artifacts before they ruin an entire recording session. Wired units are especially recommended to eliminate Bluetooth latency.
Improve the Room Before Buying Premium Gear
Even the finest microphone will struggle in a poorly treated room. Bare floors, hard walls, large windows, and empty spaces bounce your voice right back into the mic, generating hollow echoes and distant-sounding speech.
You do not need expensive acoustic foam on every surface. Everyday items like rugs, curtains, couches, bookcases, and other soft materials effectively absorb reflections. Even a walk-in closet packed with garments offers natural sound dampening. While acoustic panels are helpful, optimizing your room layout should be the first priority.
This reality redefines how to approach a starter budget. A $100 to $170 dynamic microphone deployed in a controlled environment will consistently outperform high-end gear placed in a loud, reverberant space. Superior hardware cannot compensate for deficient room acoustics.
Choose USB or XLR Based on Actual Needs
USB provides the most straightforward path for a debut podcast. Compatible mics connect straight to your computer, eliminating the need to purchase an interface right away. A basic kit consisting of a microphone, wired headphones, a boom arm, and a pop filter handles solo shows and remote chats quite capably.
Conversely, XLR introduces greater scalability. An audio interface bridges an XLR microphone to a computer while giving you direct physical control over gain levels. This route becomes essential when expanding to multiple microphones or requiring granular control over distinct audio feeds.
Current beginner guidance places a standard entry-level setup between $100 and $150, with the microphone representing the largest outlay. More advanced XLR configurations naturally drive up costs once you factor in interfaces, specialized cables, additional mics, and acoustic treatment.
Also Read – Does Your TV Have a Microphone? How to Check and Turn it Off Immediately
Build Around Clear Sound, Not More Equipment
Launching a successful podcast does not call for an audio mixer, a costly studio mic, or walls lined with foam wedges. The smartest initial investments target specific problems: a dynamic microphone captures clean vocals, headphones reveal audio flaws, a boom arm secures proper placement, and a pop filter tames harsh air blasts.
Acoustic management should come right after these core elements. Once those basics are met, adding an XLR interface, shock mount, or acoustic panels can facilitate further expansion. This progression ensures your money goes toward changes listeners can genuinely appreciate. Ultimately, clear audio stems from thoughtful mic selection, correct positioning, room control, and practical accessories rather than a desktop crowded with expensive hardware.
FAQs
1. What equipment does a beginner need for podcasting?
A dynamic microphone, closed-back headphones, a boom arm, and a pop filter form a complete starter kit.
2. Is USB or XLR better for podcasting?
USB offers simplicity for newcomers, whereas XLR provides greater long-term flexibility and multi-mic expansion.
3. How far should the microphone be from my mouth?
A distance of 6 to 12 inches is standard. Tilting the microphone slightly can also help minimize harsh plosives.
4. Do I need acoustic panels for podcasting?
Not necessarily. Household items like rugs, curtains, sofas, bookcases, and clothing can suppress reflections before you buy dedicated panels.
5. Do I need an expensive microphone for good podcast audio?
No. Proper mic positioning, environmental control, and affordable accessories can yield fantastic results without premium gear.